


Firebase Authentication with MVVM and Hilt : PART II
A quick and simple guide to implementing Firebase authentication with the MVVM pattern and Hilt dependency injection.


The app we are going to build will use the following:
- MVVM architecture pattern
- Dependency injection using Hilt
- 100% Kotlin language
- Kotlin coroutines
- Firebase authentication SDKs
- Material design
- Jetpack Navigation component
- Kotlin channels and Flows
- View binding
Tutorial:
First, we will start by creating our Firebase project. We need to create and set up our Firebase project for the purpose of registering our android app so that we can be able to add various firebase SDKs for any number of products provided by Firebase. In our case, we will be using the authentication SDK.
If you have a firebase project already created and are familiar with how to add your application go ahead and do so, if you do not have any created, go ahead and create one by following these steps as highlighted in this video by Byte Journey on YouTube: HERE
With the account setup and application added to your Firebase project, we can now simply add the authentication SDK to our application. The good developers at google ensured that our work would be minimum as possible by providing a Firebase assistant tool in android studio IDE. Just go to tools then select Firebase and the firebase assistant window will appear as shown here:
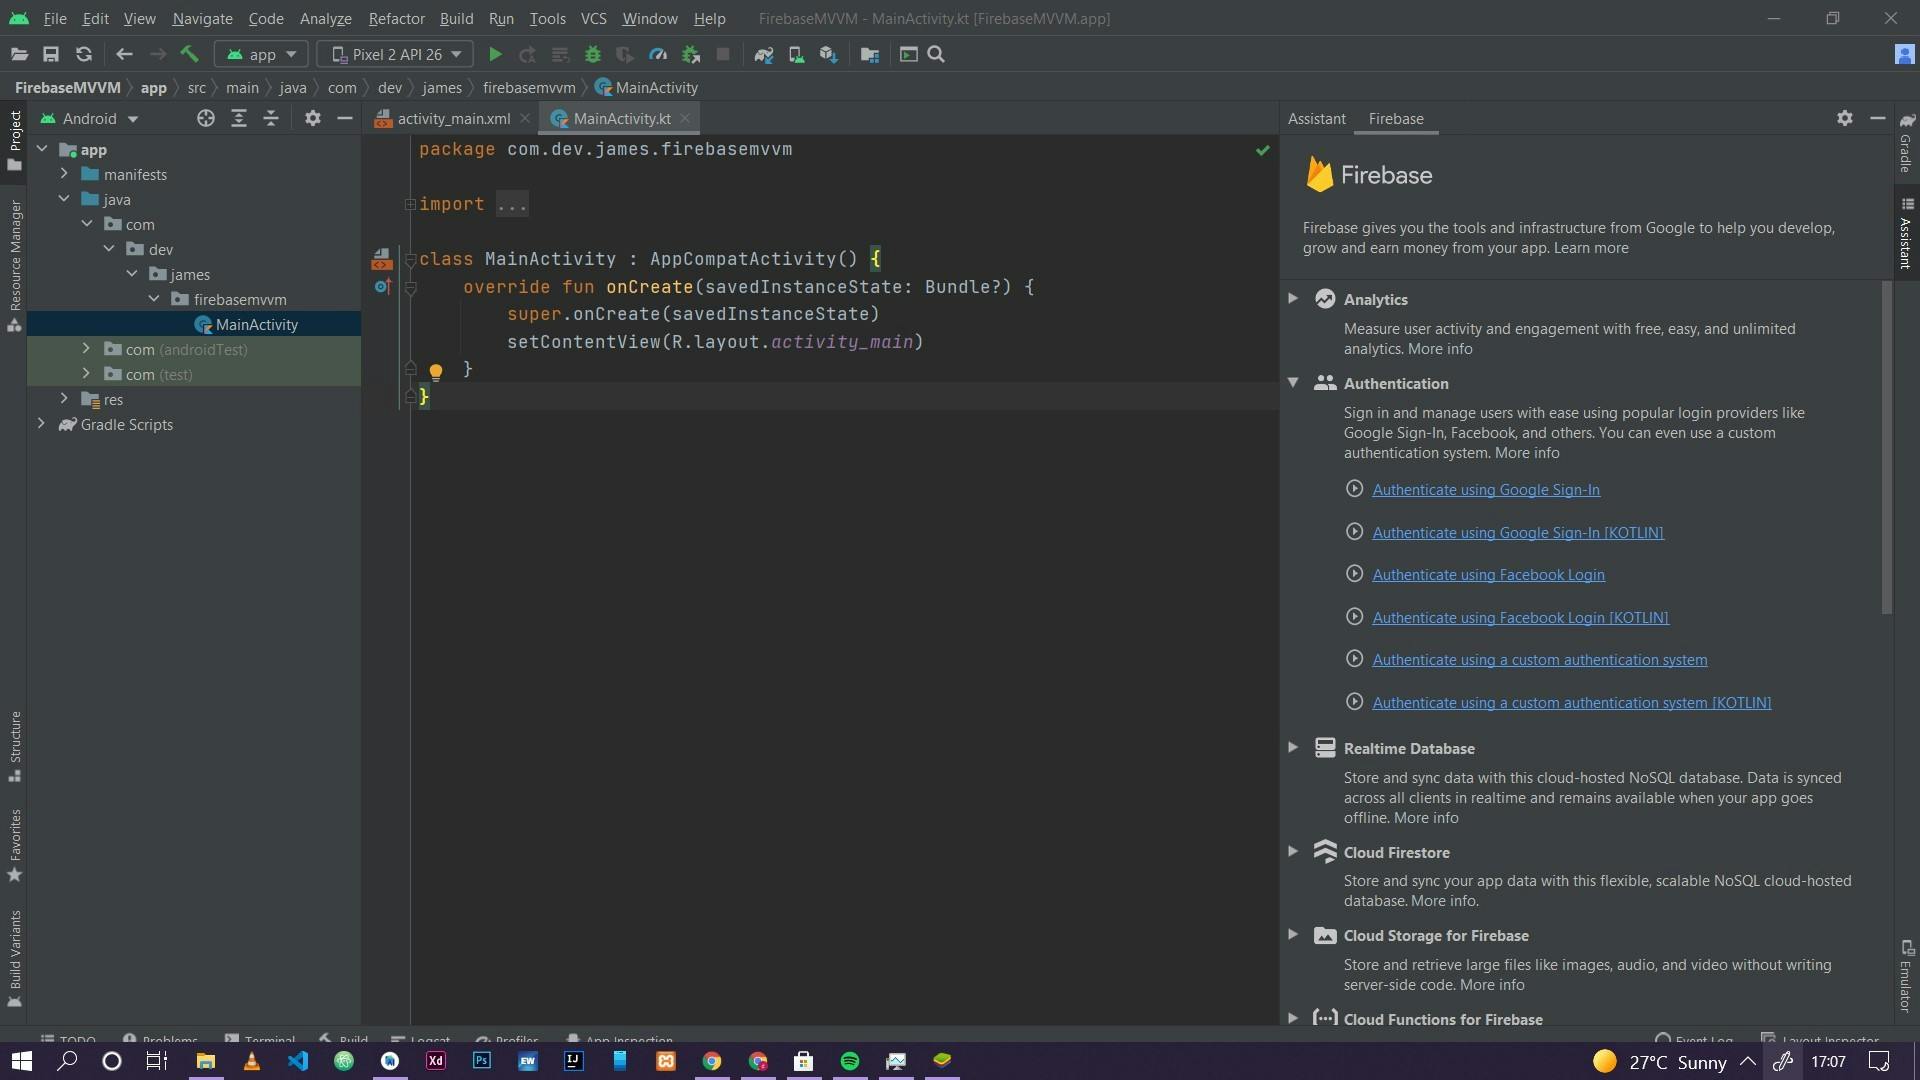
Expand the Authentication card then select Authenticate using a custom authentication system [KOTLIN]. In this tutorial, we will not create a custom authentication system. We select this so that we can be able to add the authentication SDK to our application. Go ahead and select the Add the Firebase Authentication SDK to your app button. Select Accept Changes then wait for the project to finish syncing. Just like that, we have added the firebase authentication SDK.
The final step with Firebase is to ensure authentication with email and password is enabled in your firebase console. Go to your project console. On the side menu select authentication. Select the sign-in method tab, select Email/Password, and then click the Enable switch button to enable authentication with email and password.

As you can already tell, Firebase offers a variety of authentication methods including Facebook, Google, Twitter, Github, etc. As for this tutorial, we will concentrate on email and password authentication. Other forms of authentication will be covered in part two of this series.
Next, we continue to add the rest of the dependencies to our application and design our UI for interaction. You will find the necessary dependencies and the designed UI in this GitHub repository for this tutorial: Github link
Done with the setup? Great! Let's start building the functionality of the application. Referring to our MVVM diagram from above we will start building from the bottom of the MVVM tree heading towards the top. That is, from our remote firebase service, through the repository then the view model and finally finishing up in our view/UI. In this way, we get a clear grasp of how the data moves from the Firebase SDKs going up to what we see in the UI.
1. Create BaseAuthenticator.kt and FirebaseAuthenticator.kt
BaseAuthenticator.kt
interface BaseAuthenticator {

    //this class will implement all the basic authentication api calls. Using this method of abstraction
    //will allow us to implement any type of authentication api may it be
    //that you have built your own or Firebase auth sdks. This makes it easy to swap
    //in the future because all authentication classes you will use will inherit behaviour from this base class.
    //Also in testing it will make it easy to swap your actual sdks with fake ones

    suspend fun signUpWithEmailPassword(email:String , password:String) : FirebaseUser?

    suspend fun signInWithEmailPassword(email: String , password: String):FirebaseUser?

    fun signOut() : FirebaseUser?

    fun getUser() : FirebaseUser?

    suspend fun sendPasswordReset(email :String)
}
FirebaseAuthenticator.kt
class FirebaseAuthenticator : BaseAuthenticator {
    override suspend fun signUpWithEmailPassword(email: String, password: String): FirebaseUser? {
        Firebase.auth.createUserWithEmailAndPassword(email,password).await()
        return Firebase.auth.currentUser
    }

    override suspend fun signInWithEmailPassword(email: String, password: String): FirebaseUser? {
        Firebase.auth.signInWithEmailAndPassword(email , password).await()
        return Firebase.auth.currentUser
    }

    override fun signOut(): FirebaseUser? {
        Firebase.auth.signOut()
        return Firebase.auth.currentUser
    }

    override fun getUser(): FirebaseUser? {
        return Firebase.auth.currentUser
    }

    override suspend fun sendPasswordReset(email: String) {
        Firebase.auth.sendPasswordResetEmail(email).await()
    }
}
The BaseAuthenticator interface will hold all the common authentication functions i.e signing in, signing up, signing out, and requesting a password reset. This interface will later be implemented by the FirebaseAuthenticator. Why are we using this approach? By inheriting from the BaseAuthenticator interface, we create an abstraction layer, in that, the application will not know which authentication service it's using. The service may be firebase or your own custom authentication APIs. At the end of the day, the application should implement those four basic functions as stipulated above.
Let me expound further. Since the FirebaseAuthenticor class inherits from the BaseAuthenticator interface they will share the same behavior. Therefore we will simply return it (FirebaseAuthenticator) in our hilt app module when we are required to provide an instance of an authenticator. So in the future when we let's say, change from Firebase authentication SDKs to custom authentication APIs, we will simply inherit from the same interface and simply change the app module from returning the FirebaseAuthenticator as our authenticator to our CustomApi class that we created. This approach makes it easy to maintain the app. The same can be done for testing, we can create a fake class that mimics authentication SDKs and inherit from the base authenticator class then in our tests return that fake class as our authenticator
2. Create our BaseAuthRepository and AuthRepository
BaseAuthRepository.kt
interface BaseAuthRepository {

    //this is an interface that will implement all common authentication
    //functions. That is sign in  , sign up , logout. Taking this approach will allow us
    // to rely on abstractions rather than a concrete authentication repository class. This
    //will make it easy for us to test and maintain in that whatever form of repository class
    //we will use it won't matter since all will inherit from this class. So swapping
    //of repositories will be easy.

    suspend fun signInWithEmailPassword(email:String , password:String): FirebaseUser?

    suspend fun signUpWithEmailPassword(email: String , password: String): FirebaseUser?

    fun signOut() : FirebaseUser?

    fun getCurrentUser() : FirebaseUser?

    suspend fun sendResetPassword(email : String) : Boolean
}
AuthRepository.kt
class AuthRepository @Inject constructor(
     private val authenticator : BaseAuthenticator
 ) : BaseAuthRepository {
     override suspend fun signInWithEmailPassword(email: String, password: String): FirebaseUser? {
         return authenticator.signInWithEmailPassword(email , password)
     }

     override suspend fun signUpWithEmailPassword(email: String, password: String): FirebaseUser? {
         return authenticator.signUpWithEmailPassword(email , password)
     }

     override fun signOut(): FirebaseUser? {
         return authenticator.signOut()
     }

     override fun getCurrentUser(): FirebaseUser? {
         return authenticator.getUser()
     }

     override suspend fun sendResetPassword(email: String): Boolean {
         authenticator.sendPasswordReset(email)
         return true
     }
 }
The idea is the same as the BaseAuthenticator interface with the FirebaseAuthenticator class.
The AuthRepository has the BaseAuthenticator injected into it by Hilt. Remember in our app module we shall provide which authenticator to use. The authentication functions are required to return an instance of FirebaseUser which will, in turn, be used to manage the UI.
3. Setup Hilt: BaseApplication and AppModule
Now we set up Hilt. Create a new kotlin class name it BaseApplication like so:
@HiltAndroidApp
class BaseApplication : Application()
Then in the manifest ensure that you add the BaseApplication within the application tag like so:
<application
        android:name=".BaseApplication"
        android:allowBackup="true"
        android:icon="@mipmap/ic_launcher"
        android:label="@string/app_name"
        android:roundIcon="@mipmap/ic_launcher_round"
        android:supportsRtl="true"
        android:theme="@style/Theme.FirebaseMVVM">
</application>
Then proceed to create the AppModule ensure it is an object:
@Module
@InstallIn(SingletonComponent::class)
object AppModule {

    /**All of our application dependencies shall be provided here*/

    //this means that anytime we need an authenticator Dagger will provide a Firebase authenticator.
    //in future if you want to swap out Firebase authentication for your own custom authenticator
    //you will simply come and swap here.
    @Singleton
    @Provides
    fun provideAuthenticator() : BaseAuthenticator{
        return  FirebaseAuthenticator()
    }

    //this just takes the same idea as the authenticator. If we create another repository class
    //we can simply just swap here
    @Singleton
    @Provides
    fun provideRepository(authenticator : BaseAuthenticator) : BaseAuthRepository {
        return AuthRepository(authenticator)
    }
}
The BaseApplication class is required by Hilt and is usually annotated with @HiltAndroidApp. The annotation is responsible for code generation. This base class will also serve as the application-level dependency container.
The AppModule helps us to constructor inject our interfaces (BaseAuthRepository, BaseAuthenticator). Remember not all types can be constructor injected. Furthermore, this Module class will inform Hilt how to provide instances of certain types. In our case, instances of our authenticator and repository. We annotate modules with @Module and add the @InstallIn annotation to tell Hilt which android class this module will be used or installed in. In our case, we will install our module in SingletonComponent class meaning it will be used in our entire application lifecycle. Therefore, the module will be installed immediately onCreate is called and will be uninstalled when onDestroy is called.
The functions annotated with @Provides mean that we are telling Hilt how to provide instances of the type being returned by the function. For example, whenever the app needs an instance of BaseAuthenticator it should return a FirebaseAuthenticator, remember FirebaseAuthenticator inherits from BaseAuthenticator therefore they share the same behavior. Hilt will execute the function body every time it needs to provide an instance of that type. The @Singleton tells hilt that the same instance of the return type should be returned whenever it is required.
Whenever we need to change a type of authenticator or repository we simply change what is being returned in the @Provides methods. Just make sure the return type and the class being returned within the body of the function share the same behaviour.
4. ViewModel
We create a new class we call it MainViewModel and it will implement the ViewModel() class:
@HiltViewModel
class MainViewModel @Inject constructor(
    private val repository : BaseAuthRepository
) : ViewModel() {

    private val TAG = "MainViewModel"

    /**This is a ViewModel class and is responsible for the logic of all ui.
     * It shall be shared with the three fragments.
     * Only share ViewModels when the fragments share a feature or functionality */

    //create the auth state livedata object that will be passed to
    //the home fragment and shall be used to control the ui i.e show authentication state
    //control behaviour of sign in and sign up button
    private val _firebaseUser = MutableLiveData<FirebaseUser?>()
    val currentUser get() = _firebaseUser

    //create our channels that will be used to pass messages to the main ui
    //create event channel
    private val eventsChannel = Channel<AllEvents>()
    //the messages passed to the channel shall be received as a Flowable
    //in the ui
    val allEventsFlow = eventsChannel.receiveAsFlow()


    //validate all fields first before performing any sign in operations
    fun signInUser(email: String , password: String) = viewModelScope.launch{
        when {
            email.isEmpty() -> {
                eventsChannel.send(AllEvents.ErrorCode(1))
            }
            password.isEmpty() -> {
                eventsChannel.send(AllEvents.ErrorCode(2))
            }
            else -> {
                actualSignInUser(email , password)
            }
        }
    }

    //validate all fields before performing any sign up operations
    fun signUpUser(email : String , password: String , confirmPass : String)= viewModelScope.launch {
        when{
            email.isEmpty() -> {
                eventsChannel.send(AllEvents.ErrorCode(1))
            }
            password.isEmpty() -> {
                eventsChannel.send(AllEvents.ErrorCode(2))
            }
            password != confirmPass ->{
                eventsChannel.send(AllEvents.ErrorCode(3))
            }
            else -> {
                actualSignUpUser(email, password)
            }
        }
    }


    private fun actualSignInUser(email:String, password: String) = viewModelScope.launch {
        try {
            val user = repository.signInWithEmailPassword(email, password)
            user?.let {
                _firebaseUser.postValue(it)
                eventsChannel.send(AllEvents.Message("login success"))
            }
        }catch(e:Exception){
            val error = e.toString().split(":").toTypedArray()
            Log.d(TAG, "signInUser: ${error[1]}")
            eventsChannel.send(AllEvents.Error(error[1]))
        }
    }

    private fun actualSignUpUser(email:String , password: String) = viewModelScope.launch {
        try {
            val user = repository.signUpWithEmailPassword(email, password)
            user?.let {
                _firebaseUser.postValue(it)
                eventsChannel.send(AllEvents.Message("sign up success"))
            }
        }catch(e:Exception){
            val error = e.toString().split(":").toTypedArray()
            Log.d(TAG, "signInUser: ${error[1]}")
            eventsChannel.send(AllEvents.Error(error[1]))
        }
    }

    fun signOut() = viewModelScope.launch {
        try {
            val user = repository.signOut()
            user?.let {
                eventsChannel.send(AllEvents.Message("logout failure"))
            }?: eventsChannel.send(AllEvents.Message("sign out successful"))

            getCurrentUser()

        }catch(e:Exception){
            val error = e.toString().split(":").toTypedArray()
            Log.d(TAG, "signInUser: ${error[1]}")
            eventsChannel.send(AllEvents.Error(error[1]))
        }
    }

    fun getCurrentUser() = viewModelScope.launch {
        val user = repository.getCurrentUser()
        _firebaseUser.postValue(user)
    }

    fun verifySendPasswordReset(email: String){
        if(email.isEmpty()){
            viewModelScope.launch {
                eventsChannel.send(AllEvents.ErrorCode(1))
            }
        }else{
            sendPasswordResetEmail(email)
        }

    }

    private fun sendPasswordResetEmail(email: String) = viewModelScope.launch {
        try {
            val result = repository.sendResetPassword(email)
            if (result){
                eventsChannel.send(AllEvents.Message("reset email sent"))
            }else{
                eventsChannel.send(AllEvents.Error("could not send password reset"))
            }
        }catch (e : Exception){
            val error = e.toString().split(":").toTypedArray()
            Log.d(TAG, "signInUser: ${error[1]}")
            eventsChannel.send(AllEvents.Error(error[1]))
        }
    }

    sealed class AllEvents {
        data class Message(val message : String) : AllEvents()
        data class ErrorCode(val code : Int):AllEvents()
        data class Error(val error : String) : AllEvents()
    }
}
The view model is annotated with @HiltViewModel will enable the injection of this view model by hilt and therefore the activities or fragments with the @AndroidEntryPoint annotation can get the view model instance normally using viewModelProvider or using the by deligation viewModels() KTX extension.
The auth functions are all launched in the viewModelScope coroutine scope meaning that they will exist or function within the scope of the ViewModel. Hence if the view model is terminated also the functions will be terminated. Launching these functions in a coroutine scope is important since the repository functions are suspending functions as well and we know that suspending functions can be called within a coroutine scope or other suspending functions. Read more on coroutines and scopes Here
Before executing any functions, the values gotten from the UI first undergo validation ensuring that they are not empty. If validation is passed then they are sent to the actual functions responsible. If signing in or up is successful the result, which is a FirebaseUser object is posted into _firebaseUser mutable live data which is then observed in the various fragments to control the state of the UI.
Error messages and other general messages are passed through to the UI using channels that are collected as Flow in the UI. We use channels to handle one-time events for example showing a toast with a message once. The advantage of channels is that each event is delivered to a single subscriber. An attempt to post an event without a subscriber will suspend as soon as the channel buffer becomes full, waiting for the subscriber to appear. The event to be passed to the channel is a sealed class containing data classes of the various messages we need to pass to the UI. We are using a sealed class because it will provide more control over the inheritance of this class plus sealed classes are only known at compile time.
5. Prepare the Navigation graph
The next step is to create the navigation graph from the Navigation Component. First, we need to create the nav graph in our resource folder. Just right-click on the res folder, select new then select android resource file. Name it then change the resource type to navigation. When you create, android studio will automatically create a navigation folder for you. Just go ahead and get the nav graph from the Github repository in the res folder then the navigation folder: Here
6. Views/UI
MainActivity:
@AndroidEntryPoint
class MainActivity : AppCompatActivity() {
    private lateinit var navController: NavController
    override fun onCreate(savedInstanceState: Bundle?) {
        super.onCreate(savedInstanceState)
        setContentView(R.layout.activity_main)

        /**
         * This class will mainly hold both the
         * sign in and sign up fragments and navigation
         * will be handled by the navigation component*/

        //here we will simply setup the nav host fragment which is responsible
        //for holding all the other fragments that will be used in the app
        //the onSupportNavigationUp creates the back arrow in the toolbar.
        val navHostFragment =
            supportFragmentManager.findFragmentById(R.id.nav_host_fragment) as NavHostFragment
        navController = navHostFragment.findNavController()

        setupActionBarWithNavController(navController)

    }

    override fun onSupportNavigateUp(): Boolean {
        return navController.navigateUp() || super.onSupportNavigateUp()
    }
}
In the main activity we simply get the navHostFragemnt located in our activity_main.xml file and use it to create a navController. The navController manages app navigation within a NavHost. Therefore we connect the nav controller to the action bar with the setupActionBarWithNavController then override the onSupportNavigateUp function so that we can get the back arrow that appears on the action bar when we navigate to other fragments. The navController will be responsible for the navigation.
HomeFragment:
@AndroidEntryPoint
class HomeFragment : Fragment(R.layout.fragment_home) {

    private var _binding : FragmentHomeBinding? = null
    private val binding get() = _binding
    private val viewModel : MainViewModel by activityViewModels()
    override fun onCreateView(
        inflater: LayoutInflater,
        container: ViewGroup?,
        savedInstanceState: Bundle?
    ): View? {
        _binding = FragmentHomeBinding.inflate(inflater, container, false)
        getUser()
        registerObserver()
        listenToChannels()
        return binding?.root
    }


    private fun getUser() {
        viewModel.getCurrentUser()
    }

    private fun listenToChannels() {
        viewLifecycleOwner.lifecycleScope.launch {
           viewModel.allEventsFlow.collect { event ->
               when(event){
                   is MainViewModel.AllEvents.Message ->{
                       Toast.makeText(requireContext(), event.message, Toast.LENGTH_SHORT).show()
                   }
               }
           }
        }
    }

    private fun registerObserver() {
        viewModel.currentUser.observe(viewLifecycleOwner,{ user ->
            user?.let {
                binding?.apply{
                    welcomeTxt.text = "welcome ${it.email}"
                    signinButton.text = "sign out"
                    signinButton.setOnClickListener {
                        viewModel.signOut()
                    }
                }
            }?: binding?.apply {
                welcomeTxt.isVisible = false
                signinButton.text = "sign in"
                signinButton.setOnClickListener {
                    findNavController().navigate(R.id.action_homeFragment_to_signInFragment)
                }
            }
        })
    }

    override fun onDestroy() {
        super.onDestroy()
        _binding = null
    }
}
Here on the HomeFragment , we set up our fragment with view binding. ViewBinding removes the old tedious findViewById and allows us to directly reference our widgets by their ids set in the XML. This makes it easy and quick for us to use these widgets. More on view binding here
The getUser function uses the ViewModel getCurrentUser function to get the currently signed-in user from Firebase. In the view model , when this function is triggered and it returns the current user, it will post the user object to _firebaseUser mutable livedata in which we observe it in our home fragment as the currentUser variable in our registerObserver function. This is possible because we have set the currentUser variable to get its value as a _firebaseUser mutable livedata. With the currentUser being observed we can get to control the UI. If the current user is not null then we will show the currently signed-in user's email and the sign in button will be set to a sign-out button. When the currentUser returns null , the email of the user is not shown and the sign out button set to a sign in button and will navigate to sign in fragment if clicked. The benefit of using this approach is that with a mutable livedata we can get to detect changes of the user object continuously as long as the viemodel is active. We would not need to lets say put the application in the background then relaunch it again to get the currentUser object.
The listenToChannels function collects the channels flow with the events coming from the viemodel. These are the various error messages, messages, and error codes we set in the viewModel. The messages are just random messages from the system , the error messages come from firebase and the error codes come from validation errors. The error codes are a way to know which field has produced that error so that we can know which EditText Layout we can set the error to. For example error 1 is an email edit text field error , so that is where we will set the error message.
SignInFragment.kt
@AndroidEntryPoint
class SignInFragment : Fragment(R.layout.fragment_signin) {
    private val viewModel : MainViewModel by activityViewModels()
    private var _binding : FragmentSigninBinding? = null
    private val binding get() = _binding
    private val TAG = "SignInFragment"
    override fun onCreateView(
        inflater: LayoutInflater,
        container: ViewGroup?,
        savedInstanceState: Bundle?
    ): View? {
        _binding = FragmentSigninBinding.inflate(inflater , container , false)
        listenToChannels()
        registerObservers()
        binding?.apply {
            signInButton.setOnClickListener {
                progressBarSignin.isVisible = true
                val email = userEmailEtv.text.toString()
                val password = userPasswordEtv.text.toString()
                viewModel.signInUser(email, password)
            }

            signUpTxt.setOnClickListener {
                findNavController().navigate(R.id.action_signInFragment_to_signUpFragment)
            }
            forgotPassTxt.setOnClickListener {
                findNavController().navigate(R.id.action_signInFragment_to_resetPasswordFragment)
            }
        }
        return binding?.root
    }

    private fun registerObservers() {
        viewModel.currentUser.observe(viewLifecycleOwner, { user ->
            user?.let {
               findNavController().navigate(R.id.action_signInFragment_to_homeFragment2)
            }
        })
    }

    private fun listenToChannels() {
        viewLifecycleOwner.lifecycleScope.launch {
            viewModel.allEventsFlow.collect { event ->
                when(event){
                    is MainViewModel.AllEvents.Error -> {
                        binding?.apply {
                            errorTxt.text =  event.error
                            progressBarSignin.isInvisible = true
                        }
                    }
                    is MainViewModel.AllEvents.Message -> {
                        Toast.makeText(requireContext(), event.message, Toast.LENGTH_SHORT).show()
                    }
                    is MainViewModel.AllEvents.ErrorCode -> {
                        if (event.code == 1)
                            binding?.apply {
                                userEmailEtvl.error = "email should not be empty"
                                progressBarSignin.isInvisible = true
                            }


                        if(event.code == 2)
                            binding?.apply {
                                userPasswordEtvl.error = "password should not be empty"
                                progressBarSignin.isInvisible = true
                            }
                    }

                    else ->{
                        Log.d(TAG, "listenToChannels: No event received so far")
                    }
                }

            }
        }
    }

    override fun onDestroy() {
        super.onDestroy()
        _binding = null
    }
}
The sign-in fragment is for the signing operations. When the sign-in button is clicked, it triggers the signInUser function which ofcos takes the email and password as its arguments. After validation , the actualSignIn function will be called if email and password are not empty. Any empty fields will be detected and an error code passed to the ErrorCode event channel which in turn will be handled in the SignIn UI.
We are observing the currentUser observable here as well because if a successful sign-in occurs, we expect to get the current user object. If the currentUser is not null it means that the sign-in is successful thus we will navigate back to the home fragment. You will also notice that the channel event flow is being collected within a viewLifecycleOwner.lifeCycleScope coroutine because this coroutine will be tied to the lifecycle of the fragment. If the fragment is sent to the back of the stack , it will stop collecting that flow.
SignUpFragment.kt
@AndroidEntryPoint
class SignUpFragment : Fragment(R.layout.fragment_signup) {
    private val viewModel : MainViewModel by activityViewModels()
    private var _binding : FragmentSignupBinding? = null
    private val binding get()  = _binding
    private val TAG = "SignUpFragment"

    override fun onCreateView(
        inflater: LayoutInflater,
        container: ViewGroup?,
        savedInstanceState: Bundle?
    ): View? {
        _binding = FragmentSignupBinding.inflate(inflater , container , false)

        registerObservers()
        listenToChannels()
                binding?.apply {
                    signUpButton.setOnClickListener {
                    progressBarSignup.isVisible = true
                    val email = userEmailEtv.text.toString()
                    val password = userPasswordEtv.text.toString()
                        val confirmPass = confirmPasswordEtv.text.toString()
                    viewModel.signUpUser(email , password , confirmPass)


                }

                    signInTxt.setOnClickListener {
                        findNavController().navigate(R.id.action_signUpFragment_to_signInFragment)
                    }

                }

        return binding?.root
    }

    override fun onDestroy() {
        super.onDestroy()
        _binding = null
    }


    private fun registerObservers() {
        viewModel.currentUser.observe(viewLifecycleOwner, { user ->
            user?.let {
                findNavController().navigate(R.id.action_signUpFragment_to_homeFragment)
            }
        })
    }

    private fun listenToChannels() {
        viewLifecycleOwner.lifecycleScope.launch {
            viewModel.allEventsFlow.collect { event ->
                when(event){
                    is MainViewModel.AllEvents.Error -> {
                        binding?.apply {
                            errorTxt.text = event.error
                            progressBarSignup.isInvisible = true
                        }
                    }
                    is MainViewModel.AllEvents.Message -> {
                        Toast.makeText(requireContext(), event.message, Toast.LENGTH_SHORT).show()
                    }
                    is MainViewModel.AllEvents.ErrorCode -> {
                        if (event.code == 1)
                            binding?.apply {
                                userEmailEtvl.error = "email should not be empty"
                                progressBarSignup.isInvisible = true
                            }


                        if(event.code == 2)
                            binding?.apply {
                                userPasswordEtvl.error = "password should not be empty"
                                progressBarSignup.isInvisible = true
                            }

                        if(event.code == 3)
                            binding?.apply {
                                confirmPasswordEtvl.error = "passwords do not match"
                                progressBarSignup.isInvisible = true
                            }
                    }

                    else ->{
                        Log.d(TAG, "listenToChannels: No event received so far")
                    }
                }

            }
        }
    }
}
The sign-up fragment almost follows the same principle as the sign-in fragment, the only difference coming in is the signing-up functionality. The error messages events are collected the same way and the currentUser observable is observed here as well to control the UI and navigation back to the home fragment.
ResetPasswordFragment.kt
This fragment is for sending a password reset email in case a user forgets the password:
@AndroidEntryPoint
class ResetPasswordFragment : Fragment(R.layout.fragment_password_reset) {

    private var _binding : FragmentPasswordResetBinding? = null
    private val binding get() = _binding
    private val viewModel : MainViewModel by activityViewModels()

    override fun onCreateView(
        inflater: LayoutInflater,
        container: ViewGroup?,
        savedInstanceState: Bundle?
    ): View? {
        _binding = FragmentPasswordResetBinding.inflate(inflater , container , false)
        setUpWidgets()
        listenToChannels()
        return binding?.root
    }

    private fun listenToChannels() {
        viewLifecycleOwner.lifecycleScope.launch {
            viewModel.allEventsFlow.collect { event ->
                when(event){
                    is MainViewModel.AllEvents.Message -> {
                        Toast.makeText(requireContext(), event.message, Toast.LENGTH_SHORT).show()
                        findNavController().navigate(R.id.action_resetPasswordFragment_to_signInFragment)
                    }
                    is MainViewModel.AllEvents.Error -> {
                        binding?.apply {
                            resetPassProgressBar.isInvisible = true
                            errorText.text = event.error
                        }
                    }
                    is MainViewModel.AllEvents.ErrorCode -> {
                        if(event.code == 1)
                            binding?.apply {
                                userEmailEtvl.error = "email should not be empty!"
                                resetPassProgressBar.isInvisible = true
                            }
                    }
                }

            }
        }
    }

    private fun setUpWidgets() {
        binding?.apply {
            buttonResendPassword.setOnClickListener {
                resetPassProgressBar.isVisible = true
                val email = userEmailEtv.text.toString()
                viewModel.verifySendPasswordReset(email)
            }
        }
    }
}
Conclusion Firebase can be a great tool especially if you are looking to quickly release your product into the market. This tutorial was just a way to demonstrate using this tool with some modern android development practices. This is not the only approach there are many other ways you can approach it.
Further links and documentation that can help you:
Happy coding!!
Link to project repository: Link
If this tutorial helped you and you wish to support my work, you can buy me a coffee here: BUY ME COFFEE HERE